Transition is sometimes called the fourth discipline of triathlon. But unlike swimming, cycling, or running, you don’t get faster at it by putting in more training hours. You get faster by being organised. Most people heading into their first or second race have put real effort into their swim splits and their run pace. Then they spend four minutes in T1 fumbling with a wetsuit sleeve. These triathlon transition tips will help you stop giving away free time.
TL;DR
Transition time is almost entirely about preparation. Lay out your gear in race order before the event, practise going through each movement at home, and know the layout of the transition area before you rack your bike. T1 and T2 don’t have to be stressful — they just have to be rehearsed.
Key Takeaways
- Visit transition before the race to find entrances, exits, and your rack spot
- Lay gear out in the exact order you’ll need it, modality by modality
- Start removing your wetsuit as soon as you exit the water
- Organise nutrition by leg: what goes on the bike, what goes in your shoes
- A tidy, practised transition is faster than a rushed one, every time
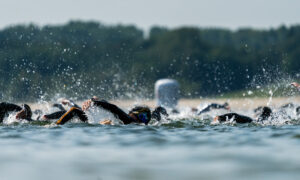
Why Transition Time Actually Matters
For most recreational athletes, T1 and T2 combined can run anywhere from 3 to 8 minutes. In a sprint triathlon, that’s not noise — that’s a meaningful chunk of your total time. And the gap between a messy transition and a clean one has nothing to do with fitness.
If you’re racing a sprint or Olympic distance event and want to know more about what to expect time-wise, the full breakdown of triathlon formats is worth a read: different distances have very different transition dynamics.
Before Race Day: Preparation Starts at Home
Read the Race Guide
This sounds obvious. Most people skip it anyway.
Transition areas have rules. Some races require helmets to be on before touching the bike. Others have specific rack directions or designated mount/dismount lines. If you show up not knowing these, you either waste time figuring it out or risk a penalty.
Read the event guidelines. Watch the pre-race seminar if one is offered. Takes 20 minutes and removes a lot of uncertainty on race morning.
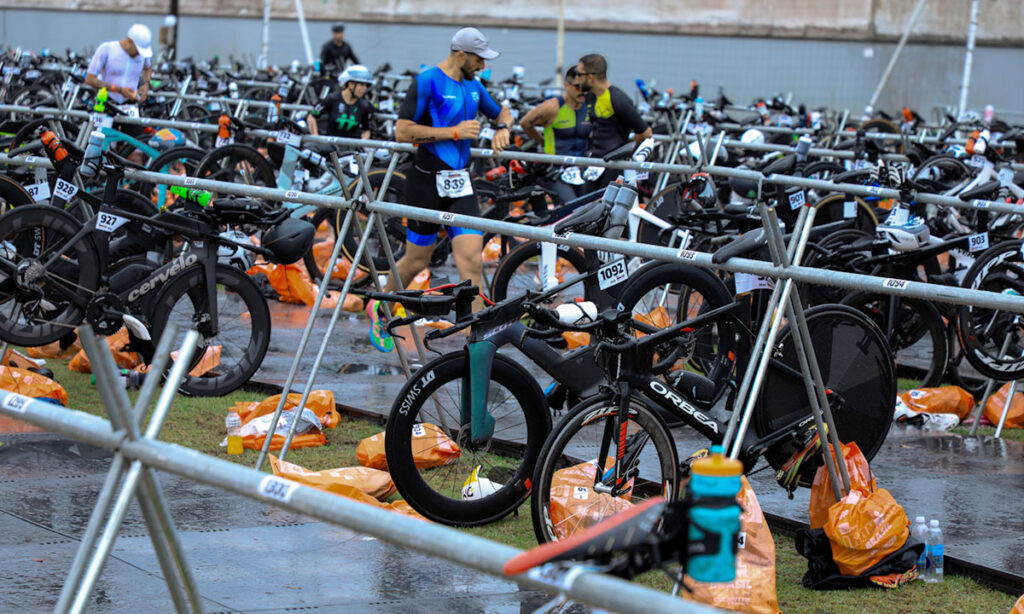
Walk the Transition Area Before Your Wave
When you rack your bike the morning of the race, don’t just drop it and leave. Walk the full route you’ll run. Find the swim exit, locate your rack, identify where T1 ends and the bike mount line is. Then find T2 — the bike return and the run exit.
A transition area looks completely different when you’re in it post-swim, wet and moving fast. A landmark helps. Some people count rack rows. Others memorise a nearby sign or cone. Whatever works.
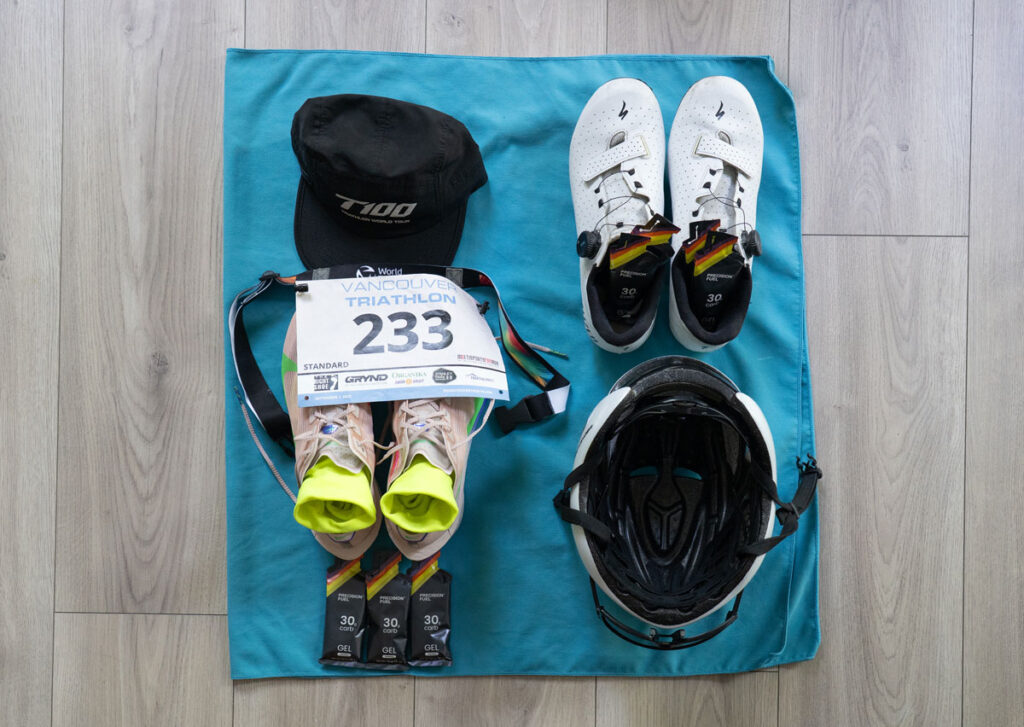
Practise at Home with a Towel
Lay a bright towel on the floor and set up your gear exactly as it would be at the race. Everything in race order, everything in the spot it’ll be on race day.
Then actually go through it. Pretend you just finished the swim. Walk yourself through T1: wetsuit off, helmet on, shoes on, nutrition sorted, go. Then do T2: shoes off, rack bike, running shoes on, go.
It feels slightly silly. It works. The movements become automatic, which is exactly what you want when you’re oxygen-depleted and slightly disoriented.
T1: Swim to Bike
Start Removing Your Wetsuit Before You Reach Transition
As soon as you’re out of the water and running, start unzipping. Pull the suit down to your waist while you’re moving. By the time you reach your rack, you should already have your arms free.
A trick that works well: hold your goggles and swim cap in one hand. As you pull off one wetsuit sleeve, tuck the goggles and cap inside it. They’re stored. You don’t have to think about them again while stripping the rest of the suit.
Kick the suit off once you’re at your spot. Use anti-chafe balm or Vaseline around your ankles before the race. Wetsuits that stick at the ankle are a genuine time killer.
Helmet First. Always.
You cannot touch your bike without your helmet on and fastened. This is a race rule, not a suggestion, and marshals watch for it.
A simple way to make this frictionless: keep your helmet on top of your bike shoes (or on the handlebars), with your sunglasses already inside it. Helmet goes on, sunglasses go on, bike shoes go on. One motion leads to the next.
If your bike gels for the ride are not already on the bike, put them inside the helmet too. Everything in one spot.
Socks: Optional, and Race-Length Dependent
Going sockless on the bike is legal and genuinely saves time. For shorter races like sprints and Olympics, it’s worth considering — especially if you have triathlon-specific shoes with a wider fit.
I’ve raced an Olympic distance without socks. It’s fine if your shoes fit properly. I wouldn’t do it for a half or full distance without proper tri shoes and some longer training rides to confirm there’s no hot spot or rubbing issue.
If you’re going sockless on the bike, test it in training first. Not once — a few times.
Leaving Your Shoes Clipped In
This one’s an intermediate-level move. If you clip your cycling shoes into the pedals before you get on the bike, you can slip your feet in while rolling. It avoids the awkward hopping around at the mount line.
To do it safely: secure the shoes with an elastic band (around the derailleur, thru axle, or a spoke) so they hang flat and don’t drag. Once you’re moving and pedalling, the band snaps off on its own.
Practise this in training before attempting it on race day. The mount is trickier than it looks. The dismount is more intuitive — slip your feet out of the shoes in the final stretch of the bike leg, pedal the last few hundred metres with feet resting on top of the shoes, and run barefoot into T2. That part actually feels pretty seamless once you’ve done it a couple of times.
T2: Bike to Run
Organise Run Nutrition Before the Race
If you’re carrying a gel for the run, put it inside one of your running shoes before racking your bike on race morning. It’s there when you need it. You don’t have to root through a bag or hope you remembered it.
Pre-roll your socks too. Fold them back on themselves so you can pull them on quickly without fighting them. Small thing. Adds up.
For race morning nutrition strategy more broadly, there’s a dedicated guide on what to eat before a sprint triathlon that covers timing and portion sizes.
Keep Your Space Tidy
A cluttered transition mat costs you time. If you’ve just kicked off your wetsuit and it’s half on top of your shoes, you’re now dealing with a problem you created.
The goal is: arrive at your spot, do the steps in order, leave. Everything should be exactly where you expect it. That only happens if you set it up deliberately.
The One Thing That Actually Makes Transitions Faster
Practise. Not reading about it. Not watching YouTube. Physically going through the motions at home, a few times, before race day.
Transition is a skill that responds very quickly to rehearsal. You don’t need to be fast at it — you just need to not be confused. Confusion is where time goes.
If you’re still putting together your gear list, the beginner triathlon gear guide has a solid rundown of what you actually need and what’s optional.
FAQ
For a sprint triathlon, a solid T1 is 2 to 3 minutes and T2 is 1 to 2 minutes. Olympic distance is similar. If you’re consistently over 4 minutes in T1, there’s usually a specific step causing the delay — wetsuit, helmet, or footwear.
Yes, and you should. Lay your gear out on a towel in race order and walk through the full sequence. Focus on wetsuit removal and shoe transitions. A few sessions at home will make race-day transitions feel automatic.
For most races, yes. A race belt lets you clip your number on before the run without pinning it to your kit. Clip it at the back during the bike, rotate to the front for the run. It takes seconds and eliminates fumbling with safety pins in T2.
Usually yes, in shorter races. For a sprint or Olympic, going sockless on the bike and run saves 30 to 60 seconds. It only works if your shoes fit well and you’ve tested it in training. For longer distances, the blister risk usually isn’t worth it.
A flying mount is when you get on a moving bike without stopping. You push the bike to the mount line, start running alongside it, then jump on while rolling. Your shoes are already clipped in. It looks impressive and is genuinely faster — but it needs practice. Don’t try it for the first time on race day.
Related Posts
- New to triathlon? Start here: Sprint vs Olympic vs Half vs Full: Triathlon Distances Explained
- Race morning nutrition: What to Eat Before Your First Sprint Triathlon (And What to Avoid)
- Building your kit from scratch: Triathlon on a Budget: The Minimum Gear You Actually Need
Sources
- USA Triathlon Official Competition Rules — usat.org
- Triathlon Canada Technical Officials Handbook — triathloncanada.org